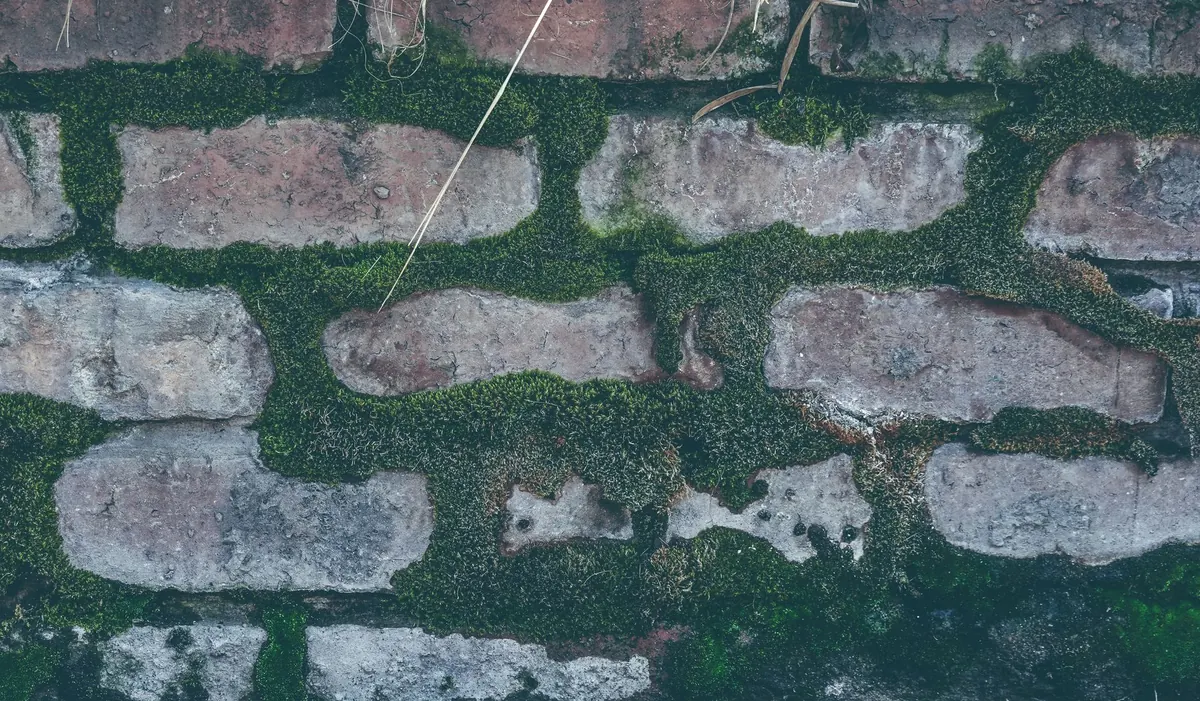
Look at any old churchyard wall and you will see what moss wants: a rough, porous surface, a little shade, and water arriving often enough to keep the stone cool. Nothing about that is hard to copy at home. Most failed attempts at growing moss on walls come down to three things — the wrong wall, a slurry applied to bone-dry stone, and a fortnight of enthusiastic watering followed by a dry spell in June. Get those right and the moss does the rest.
Which walls will work, and which to leave alone
Moss establishes fastest on walls that stay damp for long stretches. North and east-facing walls, walls under a tree canopy, walls at the foot of a hedge and walls below a dripping gutter all hold moisture well. Porosity matters just as much: sandstone, limestone, brick and lime-mortar joints soak up and release water slowly, which suits moss beautifully. Granite, slate, flint and glazed brick are hard and slick, and can stay bare for years.
Vertical surfaces dry out far faster than the ground, so be realistic. A sunny south-facing wall will only ever grow moss in patches where water lingers, usually low down or in deep joints. That mottled, uneven look is how moss behaves naturally, and it is worth aiming for rather than fighting.
One caution before you start. Keep moss away from the damp-proof course, air bricks, weep holes, painted render and any timber. Do not deliberately cultivate growth on a wall you need to inspect for cracks or repairs, and if the wall belongs to someone else — or the building is listed — ask before you begin. Moss on a wall is rarely the cause of damp indoors, but it can be a symptom of a wall that is wet for other reasons, so check the guttering and pointing first. If you have concerns about damp or structural movement, take professional advice.
Gather moss from your own patch
The best moss to use is moss that is already thriving in similar conditions nearby: a wall down the lane, a paving crack, a damp log, the edge of your own path. Lift small palm-sized patches from several different places rather than stripping one area bare. Never take moss from nature reserves, sites protected for wildlife, or churchyards managed for wildlife, and always ask permission on land that is not yours.
A few useful wall species: wall screw-moss (Tortula muralis), grey-green tufts with hair-pointed leaves; cushion moss (Grimmia pulvinata), dark compact cushions on stone; silver-moss (Bryum argenteum), that pale threadbare stuff in pavement joints; and Hypnum cupressiforme, a creeping mat-former for shadier, damper walls. Keep them roughly in the conditions you found them — the tufting species for exposed joints, the mat-formers for shade.
Prepare the stone surface
Preparation is light. Brush off loose dirt, cobwebs, dead leaves and crumbling mortar dust with a stiff hand brush, and stop there. Do not pressure-wash the wall: it drives water deep into the stone and scours the surface you want to keep rough. Leave existing lichen and algae alone; moss grows happily around both, and their presence suggests the wall is already damp enough.
Roughing up helps. Rake the joints lightly with a wire brush or the corner of an old pointing trowel to open the grain of the mortar. If the wall has been repointed recently, wait at least a few months — ideally a full season — before seeding, because fresh mortar is hard, strongly alkaline and slow to accept anything.
Spring and early autumn are the best windows. Avoid frosts and heatwaves, and work on a dull, damp day when the stone is cool.
Making and applying a moss slurry
A slurry spreads a small amount of moss over a large area. It also breaks the moss into fragments, each of which can grow on. You will need:
- Two generous handfuls of fresh moss, torn into pieces
- About 500ml water, rainwater if you have it
- 250ml buttermilk, plain yoghurt or milk — optional, but it helps the mix cling and gives a mild food source
- A tablespoon of cornflour cooked into a gel, or a little dried skimmed milk powder, as an extra tackifier if the wall is steep
Blend everything to the consistency of a thin milkshake, with visible flecks of moss still in it. Do not reduce it to a purée. Use the slurry within a day or two; a sour smell is normal.
- Soak the wall the evening before and again just before you start. The stone should be cool and damp to the touch.
- Work in shade or on a cloudy day so the slurry does not dry before it attaches.
- Paint the mix into mortar joints and rough patches first with a stiff brush, sponge or small paintbrush. Joints hold water longest, so they are where moss settles quickest.
- Use a spray bottle for a thin, speckled wash over flat faces. Damp, not dripping.
- Press a few intact moss fragments into the joints by hand. Whole cushions establish faster than slurry alone.
- Reapply two or three times across the season. The first pass often washes away, and that is normal.
Keeping the wall damp while the moss takes hold
This is the stage that decides whether you end up with a mossy wall or a faint green stain. For the first six to eight weeks, mist the wall daily in dry weather and twice a day during warm spells, early morning and dusk. Aim for a soft damping rather than run-off, which is simply wasted. Rainwater from a water butt is ideal; if you use a tap, let the water stand to reach air temperature first.
After that, let the garden do the watering. Plant the bed at the foot of the wall so that the air there stays humid, and let a shrub or climber cast some shade over the stone. A downpipe that discharges near the wall will keep one section reliably damp — and that section will be the first to green up.
Accept patchiness. Moss follows water, so it will colonise some joints thickly and ignore the rest. That irregularity is what makes an old wall look old.
Problems you might meet
- Birds pulling at the moss: sparrows and other birds collect it for nests in spring. Losses are rarely total, and the moss recovers.
- Chemicals drifting onto the wall: patio cleaners, moss killers, weedkiller and lawn feed will all set you back. Keep them well away.
- Nothing appears for weeks: check the moisture first, and the sun second. Move your efforts to a shadier section rather than watering harder.
- Slippery steps and paths: brush moss off surfaces people walk on. It has no place underfoot.
- Hard, smooth stone: scratch the surface up, concentrate on the joints, and expect it to take longer.
Let it spread, then leave it alone
Expect a green film within a few weeks, distinct tufts within a few months, and a convincing coat somewhere between one and three years. From then on the maintenance is mostly restraint: sweep fallen leaves off the wall in autumn, keep the guttering clear, and never jet-wash it. There is no need to feed moss, and no product that helps. The best thing you can do for a mossy wall is to stop tending it and let the weather finish the job.
Photo: Magda Ehlers / Pexels